
Restoring Your SQL Server Database After a Crash
By My Service Depot on Monday, October 26, 2020In part two of our series on backing up and recovering SQL server databases, we review the procedure for a trial restoration.

There are two basic parts to a well-orchestrated business data backup and recovery plan. In a previous article, we covered part one: Regularly Backing Up Your SQL Server Database. This article focuses on the second part: restoring your SQL server database. We will show you how to practice restoring a database in an effort to get you comfortable with the process and make sure you can implement it quickly and smoothly when the inevitable crash happens.
Our prior article showed how to maintain database backups at ‘D:\SqlBackups\SmartServiceDb.BAK’. The following steps will restore that backup to a new database, ‘SmartServiceRestoreTest’.
Initiate the Restore Process and Select the Backup File
In the SQL Server Management Studio (SSMS) View menu, select Object Explorer. Connect to the server needed.
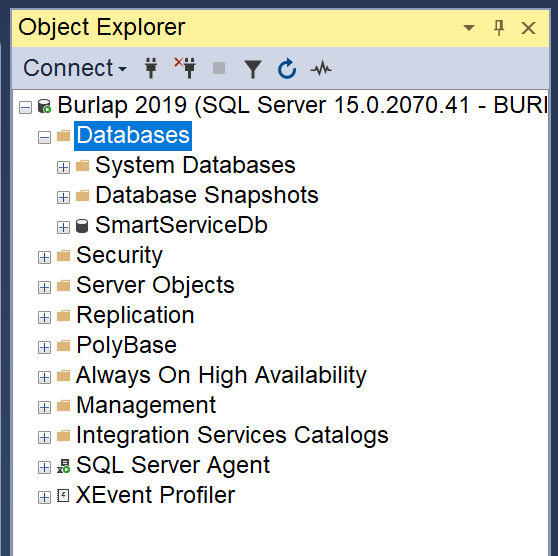
Right-click on Databases and select Restore Database. This will bring up the following dialog:
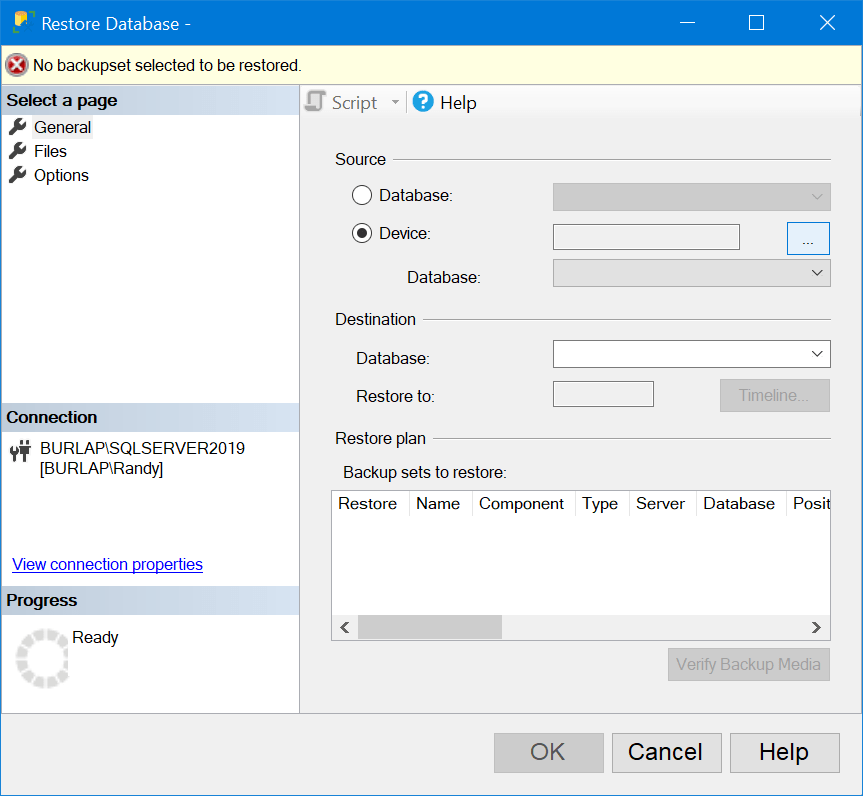
Click on the ellipse button to the right of the Device option.
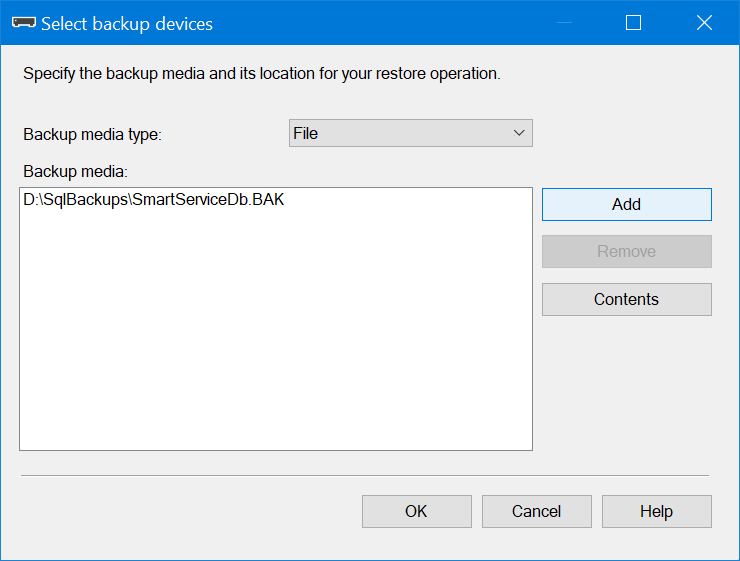
Click on the Add button and browse to your backup file (in our example, ‘D:\SqlBackups\SmartServiceDb.BAK’). Click OK in the browse dialog (not shown) and click OK in the Select backup devices dialog.
Restore Options
That brings us back to the Restore Database – SmartServiceDb dialog. You may wish to click-drag the borders of this dialog to resize it.
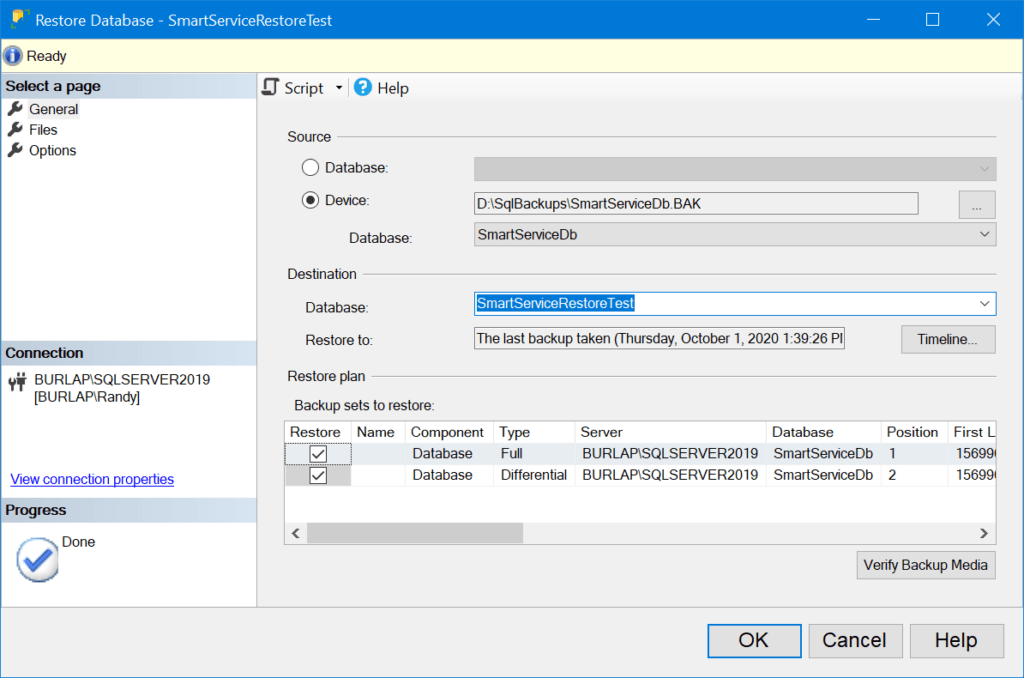
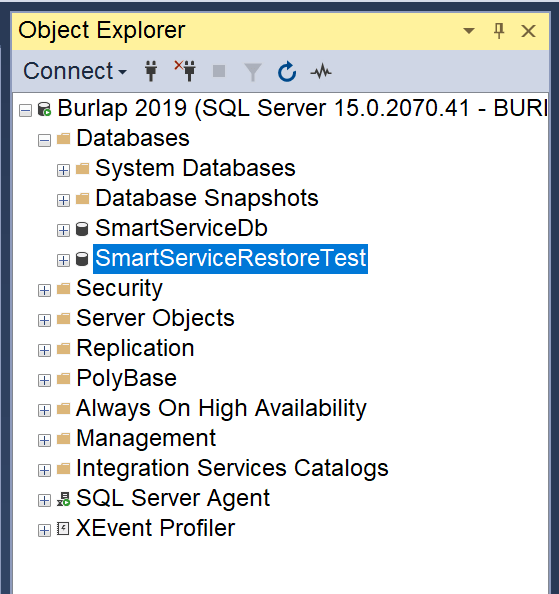
Be sure to change the Database name to something different than the current database that is in use. In this case, I changed the default, ‘SmartServiceDb’ to ‘SmartServiceRestoreTest’ as shown. Click OK. After the restore process is complete, you will see the database we just created from the backup in SSMS Object Explorer. If you have a large database or an under-performing server machine, this can take quite a while. If it takes more than an hour, you should consider reevaluating your server machine specifications.
Cleaning Up After Our Test
You should right-click Delete the Test database so it’s not left cluttering up the Object Explorer and consuming disk space where it has no purpose. Anytime you do something irrevocable such as deleting a database, be sure to examine the delete dialog carefully to ensure you are deleting the correct thing!
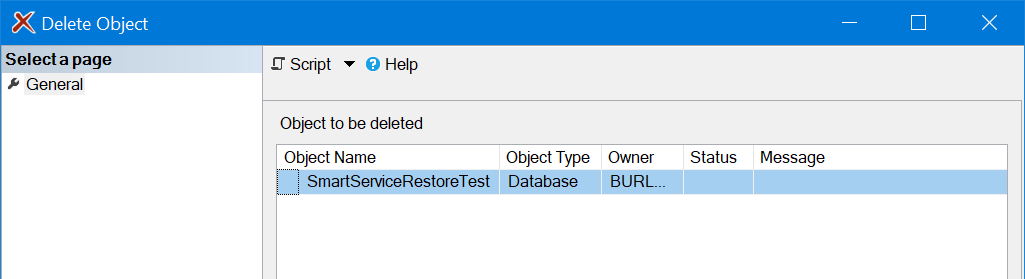
The object name confirms we are deleting ‘SmartServiceRestoreTest’ and not deleting our live, production database.
Differences in a Real Crash Recovery
In the event of an actual crash, you may have a corrupt and unusable original database still showing in SSMS Object Explorer. Be sure to shut down all connected services and dispatch software clients before performing an actual crash recovery database restore. Right-click Rename that database to something like, ‘SmartServiceDbCrashed’ before you do the restore. When following the restore steps above, do NOT change the database name to something different. Let it assume the same name it had originally. This will make reconnecting other services and dispatch software clients a smoother process.
Crash Recovery – Relocate Corrupt Database – Detach
When the original database is corrupt and unusable, but is still in SSMS Object Explorer, there are some preliminary things you can do to make the restored database more logically associated with its underlying files. Right-click on the corrupt database and select Properties.
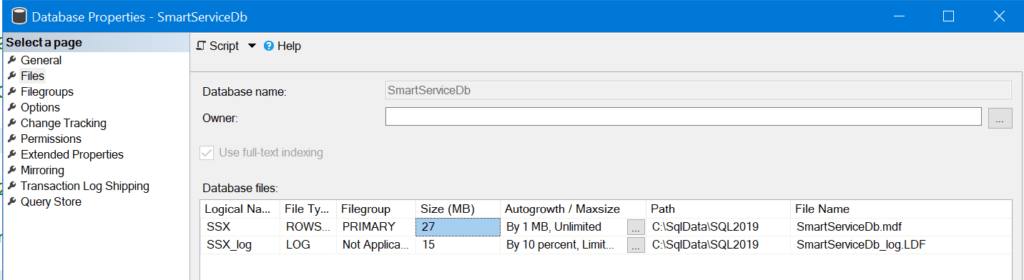
Make a note of the Path and File Name columns. Close this dialog. Next, right-click on the database in Object Explorer, select Tasks, then Detach. That will display the Detach dialog (not shown). Check the Drop Connections box and click OK. This is part of the reason for requiring that all connected services and dispatch software clients are shut down. The database will disappear from SSMS Object Explorer.
Next, use Windows File Explorer to browse to and rename the .mdf and .ldf files, i.e. ‘SmartServiceDbCrashed.mdf’ and ‘SmartServiceDbCrashed_log.ldf’.
Crash Recovery – Relocate Corrupt Database – Attach
Back in SSMS Object Explorer, right-click on Databases and select Attach… This dialog has two panes on the right, Databases to attach and Associated Files. Under the Databases to attach pane, click the Add button and browse to the .mdf file we just renamed in Windows File Explorer.
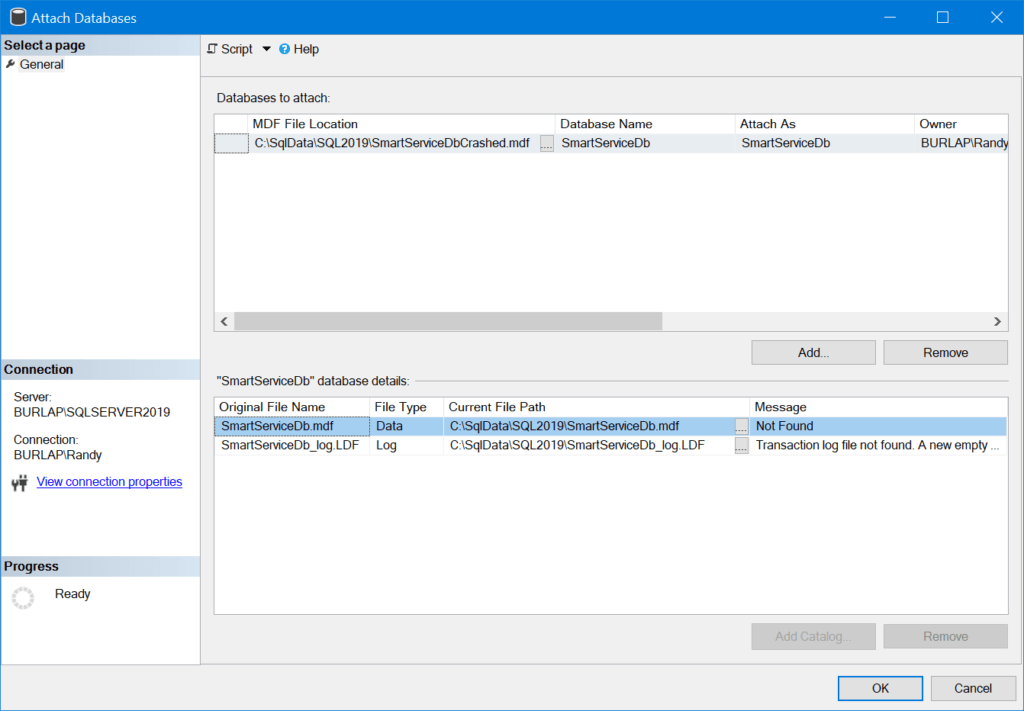
Note that the renamed files cause the right, lower pane to not have correct references for the Current File Path and Messages indicating other undesirable properties. Click on the ellipse button to the immediate right of both Current File Paths and select the renamed .mdf and .ldf files respectively. Click OK. Lastly, rename the crashed database we just attached to ‘SmartServiceDbCrashed’.
The result of detaching, renaming files, attaching, and renaming the database has these desirable results:
- The crashed database name in Object Explorer is consistent with its file names on disk.
- Restoring the database backup to its original name will also have consistent file names on disk.
Summing Things Up
That does it for our database recovery. We covered initiating the restore process, selecting the backup file, and providing a name for our restored test database. We covered cleaning up after our test. We also covered the differences between a restore test and what to do in an actual crash recovery scenario. Lastly, we covered some additional real crash recovery options to make the final result more optimally consistent with the underlying database files.
Final Thoughts
Your SQL Server database is the lifeline of your business’ data and data exchanges with your field service technicians’ mobile devices. Investing the time and resources to assure business continuity is well worth it. Current database backups and a smooth recovery from the inevitable crash represent critical parts of business continuity. A rapid restore with a backup that was made within a few minutes of the crash will have your field service technicians’ mobile devices back in operation with the least amount of data loss and service disruption possible.
Click here for part one of this series: Regularly Backing Up Your SQL Server Database.